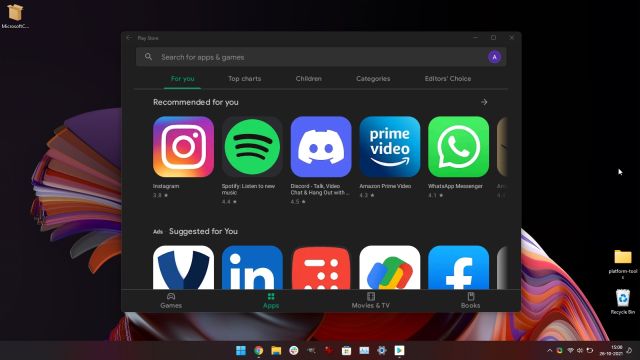
Microsoft added Android app support on Windows 11 recently, but it comes with the Amazon Appstore, which does not offer a lot of apps at the moment. So we published a tutorial on how to sideload any Android app on Windows 11. In the same vein, we bring you this guide to install Google Play Store on Windows Subsystem for Android (WSA) to make it easier to download Android apps on your Windows 11 computer. Thanks to a developer named ADeltaX, you can now directly install apps from the Google Play Store and utilize all of the Google apps as well. So if you are looking for a way to install Google Play Store on Windows 11, follow our guide below.
Note: If you have already installed WSA on your Windows 11 PC, make sure to uninstall it before proceeding with this guide.
Install Google Play Store on Windows Subsystem for Android (2021)
In this article, we have explained the step-by-step process for installing Google Play Store on Windows Subsystem for Android in Windows 11. While the tutorial is a bit technical, if you have some knowledge of Linux, Android, and Windows, you can easily make it work. You can expand the table below for easier navigation.
Requirements to Install Google Play Store on Windows 11
Before we look at the steps to get Google Play Store working on Windows 11, you need to download the following files and software on your Windows 11 machine:
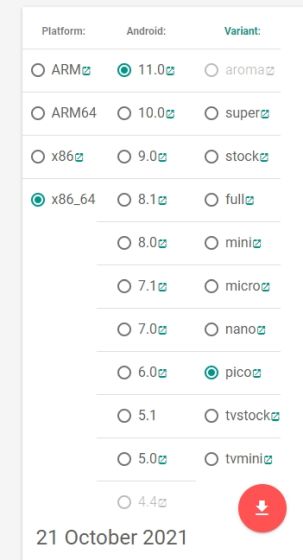
1. First of all, go ahead and download the GApps package from here. Choose “x86_64”, “Android 11”, “pico” and click the download button.
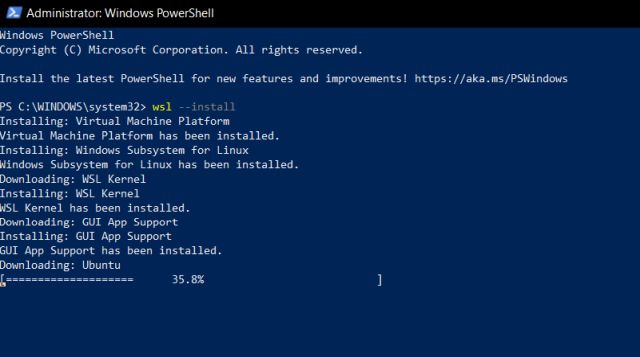
2. Next, set up WSL 2 (Windows Subsystem for Linux) on your Windows 11 PC by following our guide.
3. Download 7-Zip (Free) or any WinZip alternative to help you extract the Windows Subsystem for Android MSIX package, which we will show you how to download in the section below.
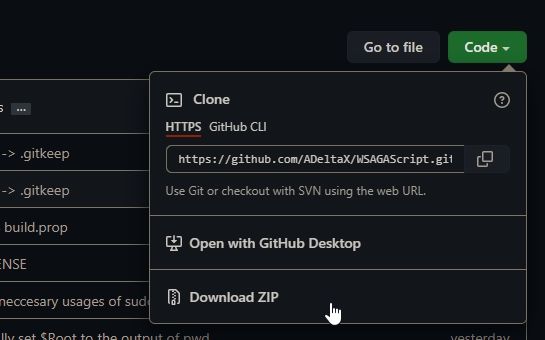
4. Finally, download the WSAGA script developed by ADeltaX. Click on this link to visit the GitHub page and open Code -> Download ZIP.
Download Windows Subsystem for Android (WSA) Package
If you already have the MSIX package of Windows Subsystem for Android, you are good to go. If not, open this website and follow the steps below to grab the package officially from Microsoft servers.
1. After opening the RG-Adguard website, choose “ProductID” from the drop-down menu to the left of the textbox. Then, you need to paste WSA’s Microsoft Store product ID, 9P3395VX91NR, in the text field. After that, choose the “Slow” ring from the drop-down menu on the right of the textbox, and click the OK button.
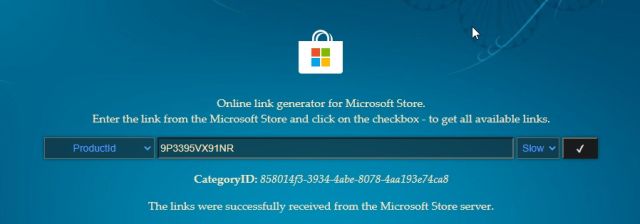
2. You will get a long list of results. Scroll to the bottom to find a msixbundle file of around 1.21 GB in size. Right-click it and choose “Save link as” to download the file. Keep in mind that clicking on the link will not download the file on some popular Windows browsers.

Managing the Windows Subsystem for Android (WSA) Files
Now that we have all the files we need to install Google Play Store on Windows 11, we will need to rearrange them before we proceed. Just follow the steps closely to get started.
1. Now that you have downloaded the WSA package, open the 7-Zip software and locate the MSIX bundle in the Downloads folder. Note that trying to open the MSIX bundle with 7-Zip from the context menu does not work in this case and might result in an error. You will have to rely on the 7-Zip software to locate the file.
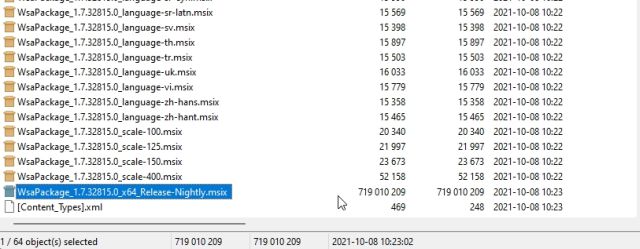
2. Once you open the MSIX bundle, look for a file that ends with “Release-nightly.msix“. There will be two files, one with ARM64 and another with x64 in the file name. Choose the x64 one and open it.
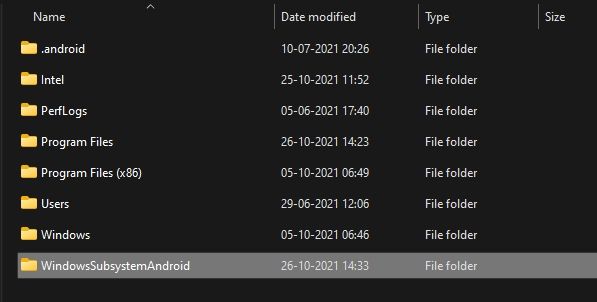
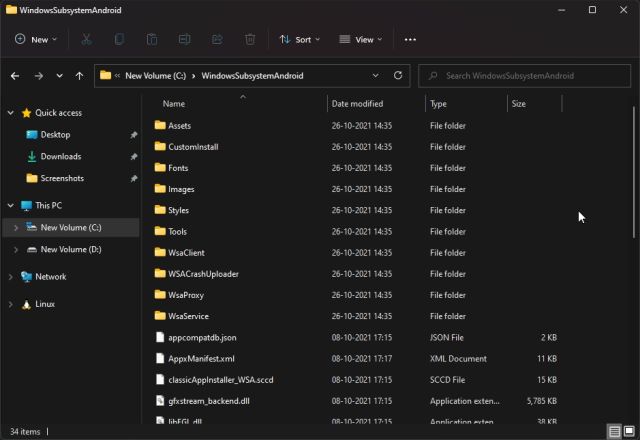
3. Next, open the C: drive and create a folder named WindowsSubsystemAndroid (without any spaces).
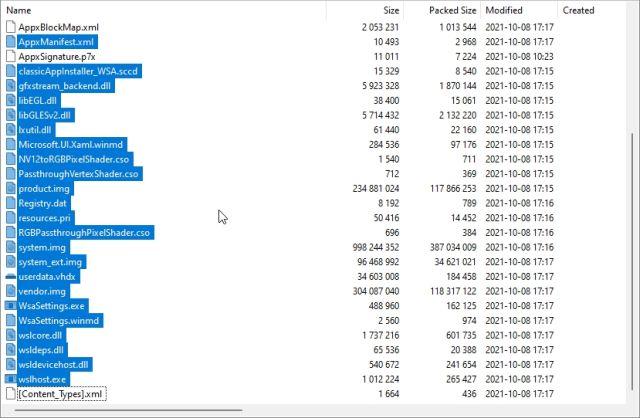
4. Then, move back to the 7-Zip window and copy everything except for AppxMetadata, AppxBlockMap.xml, AppxSignature.p7x, and [Content_Types.xml]. You can press the Ctrl key and click on these file names to deselect them after selecting all of them through the Windows 11 keyboard shortcut Ctrl + A.
5. Now, paste these files to the “WindowsSubsystemAndroid” folder.
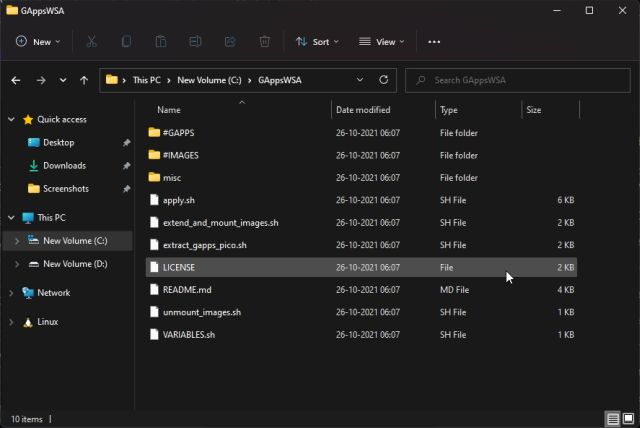
6. Similarly, create a GAppsWSA folder inside the C: drive.

7. Now, extract the WSAGA script that we downloaded above and paste the content to the GAppsWSA folder.
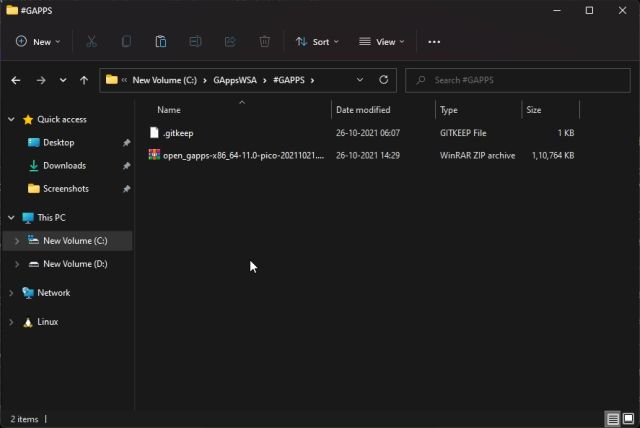
8. Next up, locate the GApps (pico) ZIP file that we downloaded above and copy it. After that, navigate to the GAppsWSA folder and move to the #GAPPS folder. Paste the GApps ZIP file here. No need to extract it.
9. Move back to the WindowsSubsystemAndroid folder and copy vendor.img, system.img, system_ext1.img, and product.img.
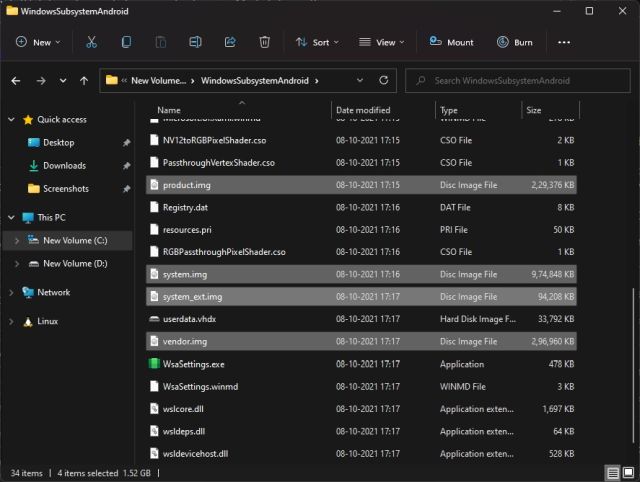
10. Now, navigate to the GAppsWSA folder and paste these four .img files in the #IMAGES folder.

Patching WSA to Include Google Apps on Windows 11
1. Once you have moved all the files as explained in the section above, go ahead and open Linux on Windows Terminal. Type sudo su and hit Enter. Now, enter the password for Linux. This will grant root privileges to Linux.
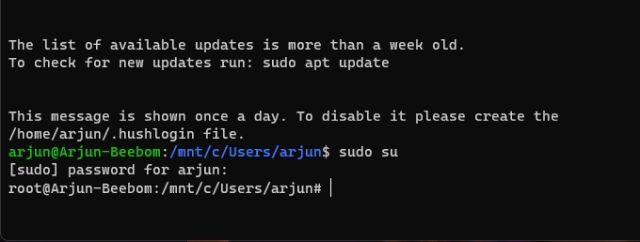
2. Next, enter the below commands to install some essential packages on Linux. You may have to press “Y” to allow the installation.
apt install lzip unzip
apt install dos2unix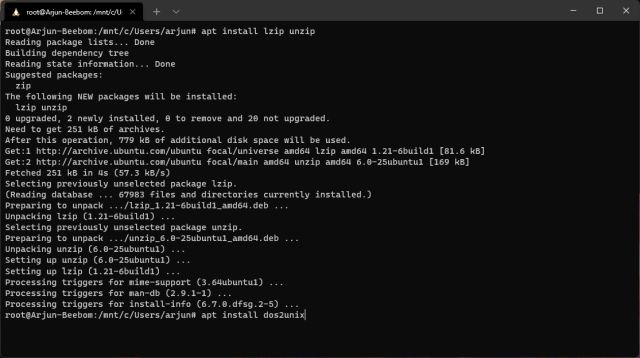
3. After that, run the below commands one by one to move to the GAppsWSA folder that we created in the C: drive. Note that there is a space between cd and dots.
cd ..
cd ..
cd GAppsWSA/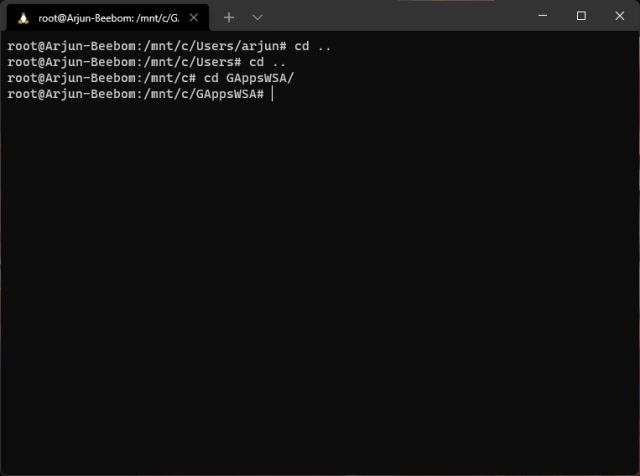
4. Once you are in the GAppsWSA folder, execute the below commands one by one.
dos2unix apply.sh
dos2unix extend_and_mount_images.sh
dos2unix extract_gapps_pico.sh
dos2unix unmount_images.sh
dos2unix VARIABLES.sh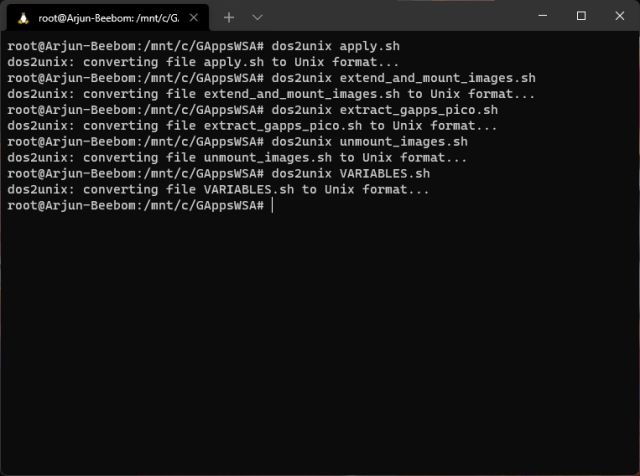
5. Having done that, run the below commands one by one. The whole process will take some time so keep patience.
./extract_gapps_pico.sh
./extend_and_mount_images.sh
./apply.sh
./unmount_images.sh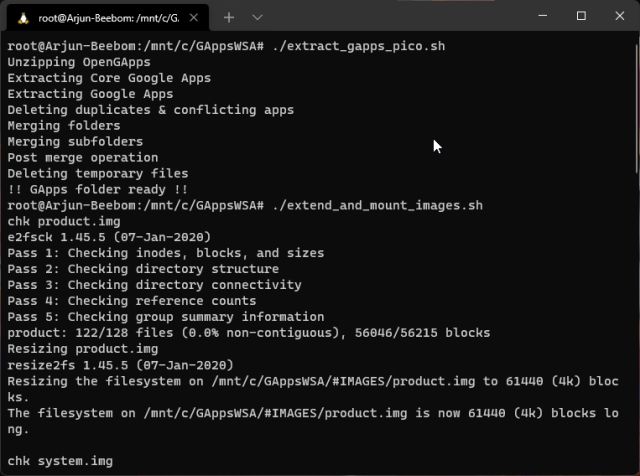
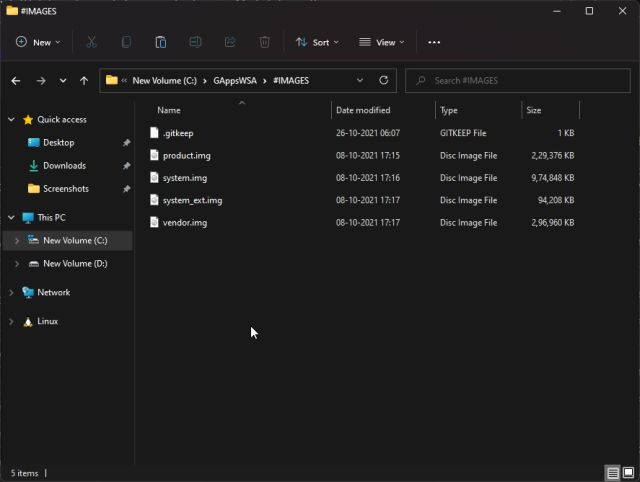
6. Now, open the #IMAGES folder under GAppsWSA and copy all four IMG files.
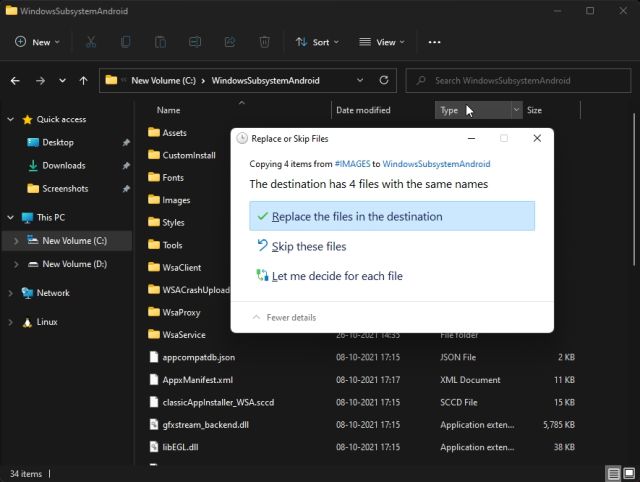
7. Move back to the WindowsSubsystemAndroid folder in C: drive and paste the four files. Choose “Replace”.
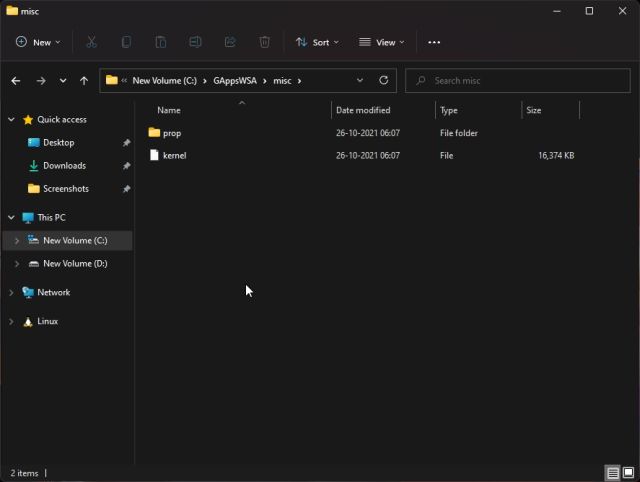
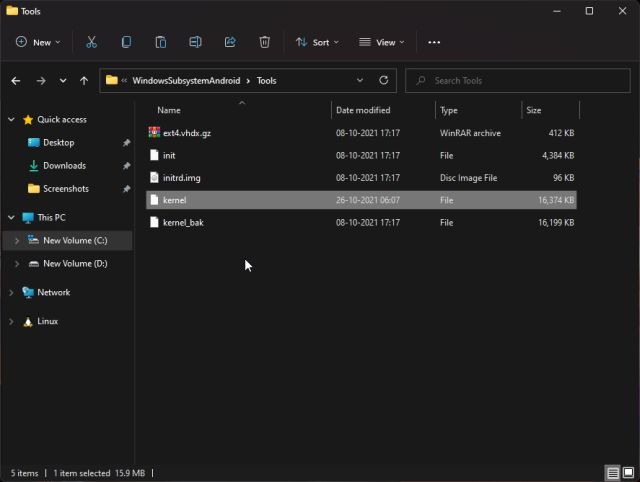
8. Again, go back to the GAppsWSA folder and move to the misc folder. Here, copy the “kernel” file.
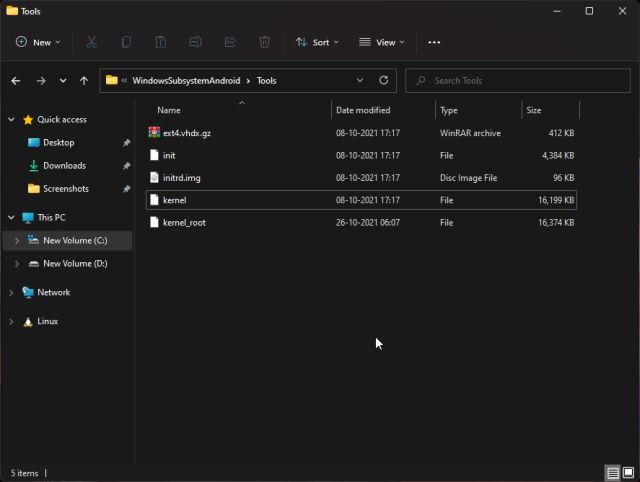
9. Now, move to the WindowsSubsystemAndroid folder and open the Tools folder. Here, you will find an existing “kernel” file. Rename it to kernel_bak. And then paste the kernel file that we copied from the misc folder under GAppsWSA. That’s it. We are finally ready to install Google Play Store on Windows 11.
Install Google Play Store on Windows Subsystem for Android
Now comes the part that you have eagerly been waiting for, installing the Play Store to easily install Android apps on your Windows 11 PC and log into them using your Google account. Just follow the steps below to proceed.
1. Press the Windows key, search for PowerShell in the Start Menu, and click on “Run as administrator” to open it.
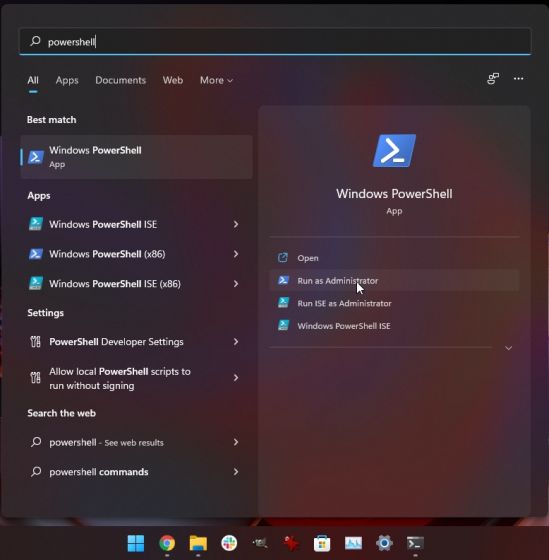
2. After that, run the below command. It will start installing the modified WSA on your Windows 11 PC.
Add-AppxPackage -Register C:\WindowsSubsystemAndroid\AppxManifest.xml
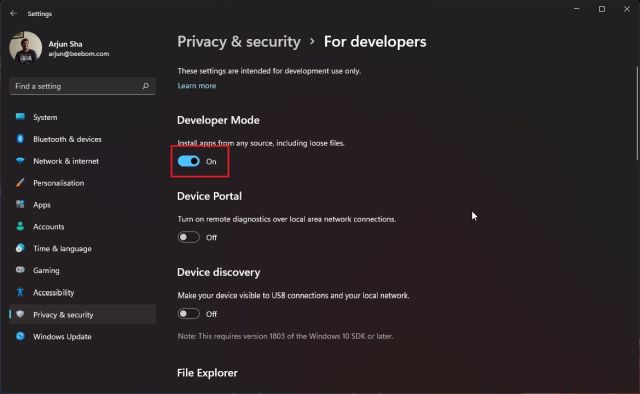
3. If you get any errors, you will have to enable Developer Mode in Windows 11 to fix the issue. Open Windows Settings -> Privacy & security -> For developers. Here, turn on the “Install apps from any source including loose files” toggle under Developer Mode. Now, run the above command, and it should work fine.
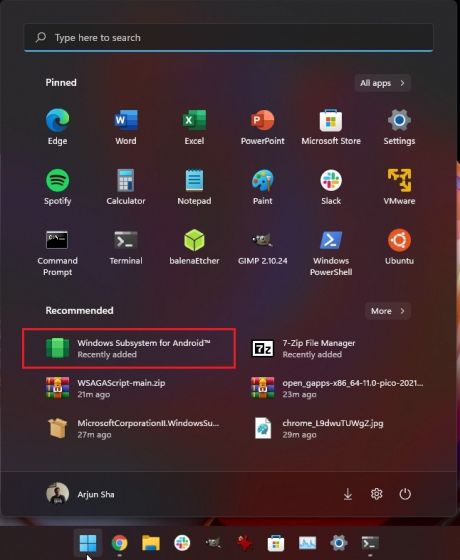
4. Now, open the Start Menu, and you will find Windows Subsystem for Android is successfully installed on your Windows 11 computer. Open it to proceed further.
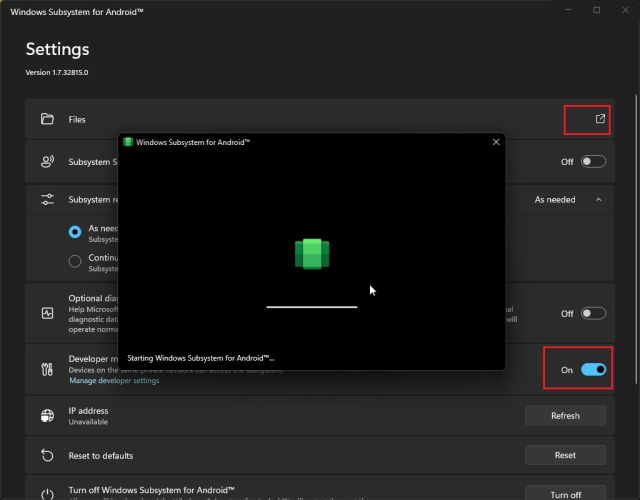
5. Under the WSA window, enable “Developer mode” to assign an IP address to the Android container. Note down the IP address as we will need it later. After that, click on “Files” at the top so that Windows Subsystem for Android actually starts running on your Windows 11 PC. Now, you can close the Files window.
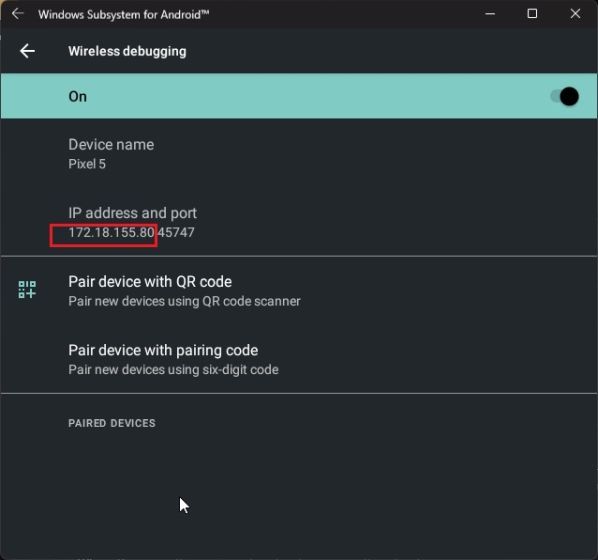
6. If the IP address is not showing up in WSA settings, click “Manage developer settings” under Developer mode. After that, scroll down in the Developer options menu and click on “Wireless debugging”. Here, note down the IP address shown under the wireless debugging settings.
6. Next, you need to set up ADB on your Windows 11 PC to connect to WSA. We are really close to accessing the Google Play Store to install Android apps with ease.
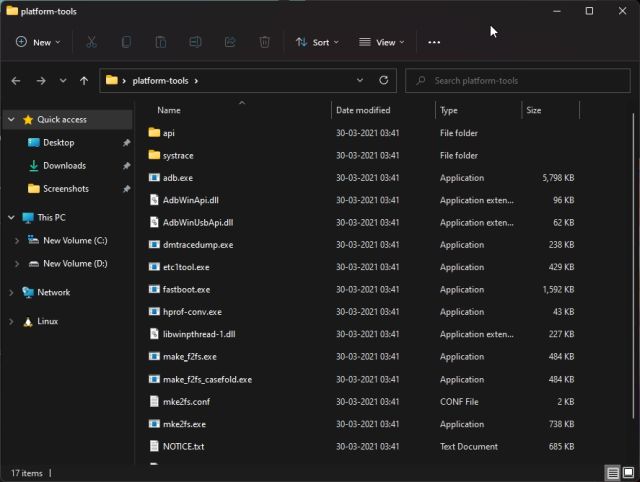
7. Once you have set up ADB, open Command Prompt in the platform-tools folder (by typing CMD in the address bar of the File Explorer) and run the below command. Make sure to replace “ipaddress” with the one you noted above. If you get a failed error, run the command again, and you will be connected this time.
adb connect ipaddress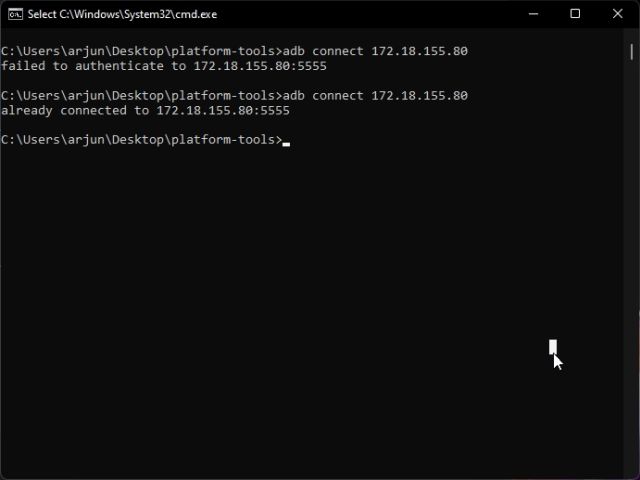
8. Next, run the below commands one by one. This will allow you to enter the Shell mode of WSA and grant superuser rights.
adb shell
su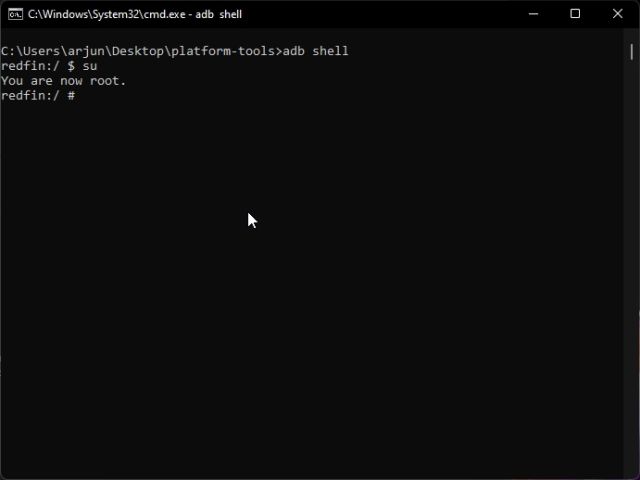
9. Finally, run the below command to change the SELinux mode to permissive.
setenforce 0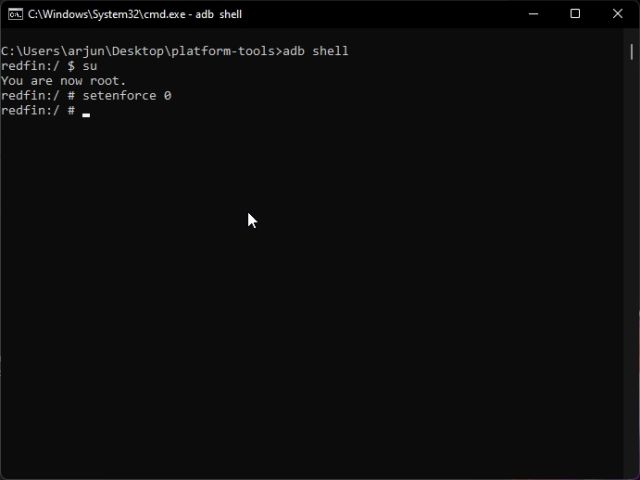
10. Now, go ahead and search for Play Store in the Start menu and open it.
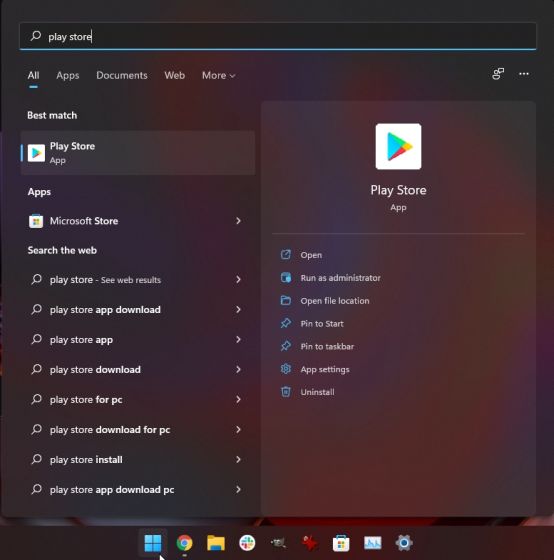
11. You will now be able to sign in with your Google account and install Android apps directly from the Google Play Store on your Windows 11 PC. And that’s how you can install Google Play Store on Windows Subsystem for Android.

Restore the Kernel on Windows Subsystem for Android
While everything is done and you have got the Play Store running on your Windows 11 machine, you need to restore the original kernel file. To do that, closely follow the steps below:
1. Close all the windows and open the Settings page of WSA. Here, turn off Windows Subsystem for Android. You should wait till the loading sign disappears.
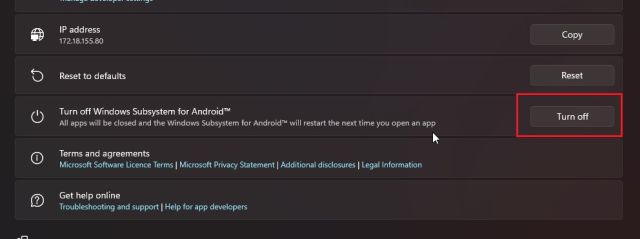
2. Now, move to the WindowsSubsystemAndroid folder in C: drive and open Tools. Here, rename the kernel file to kernel_root and kernel_bak to kernel. You are done.
Get Google Play Store on Your Windows 11 PC
So that is how you can install Google Play Services and other Google frameworks on Windows Subsystem for Android in Windows 11. It will not just allow you to officially download Android apps from the Google Play Store but also use apps dependent on Google Play Services for notifications and other services. Anyway, that is all from us. If you face any issues, let us know in the comment section below.


0 Comments
IF YOU HAVE ANY DOUBTS, PLEASE LET ME KNOW